QniGram Software support users automatically perform most functions of Instagram such as auto post on Instagram, auto change name/ avatar, auto update bio/ photo, ect. This help users save time in managing a large number of Instagram accounts.
A. MAIN FUNCTIONS OF QNIGRAM SOFTWARE – AUTO POST ON INSTAGRAM
- Check login
- Change avatar
- Change name
- Update bio
- Update Website
- Upload photo
- Upload photo with watermark
- Scrape users
- Auto Follow Users
- Auto search and Follow Users
- Increase follow
- Unfollow Users
- Like user’s photo
- Like post
- Watch video
- Auto comment
- Increase comment
- Auto Message
- Multi-threads
- Support using Dcom or Proxies to change IP easily
B. HOW TO DOWLOAD QNIGRAM SOFTWARE – AUTO POST ON INSTAGRAM?
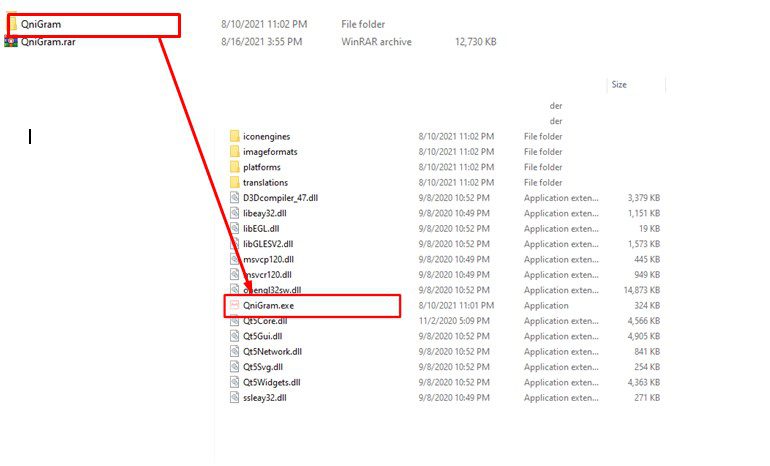
When you buy QniGram software, we will provide you with 3 links, consisting of software link, desktop useragent file and mobile useragent file. Download all these files and unzip the Qnigram.rar then run the .exe file to open the software.

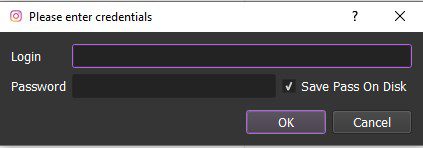
Use the provided license username and password to fill in Login and Password.
Click OK to login.

You choose one of two ways:
- Run now: Run the software instantly
- Schedule: Schedule the application to run at specific time

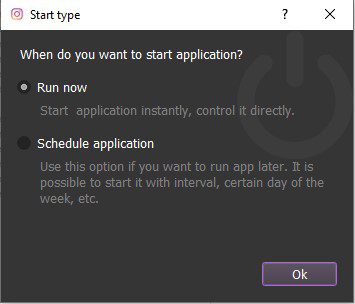
Learn more: How to use Schedule Tool.
C. BASIC SETTING OF QNIGRAM – AUTO POST ON INSTAGRAM
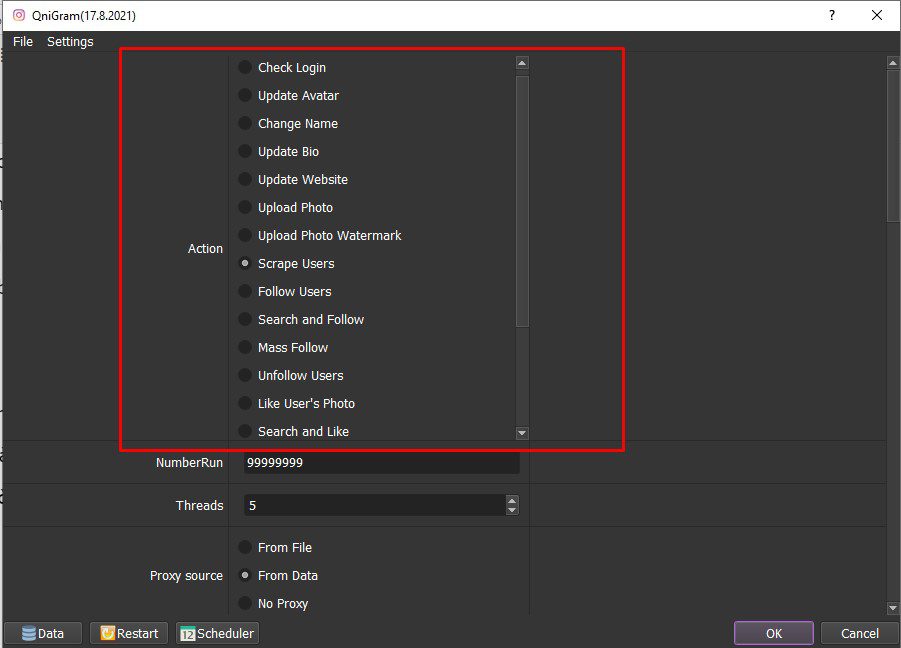
The following screenshot will show you all parameters of QniGram software:
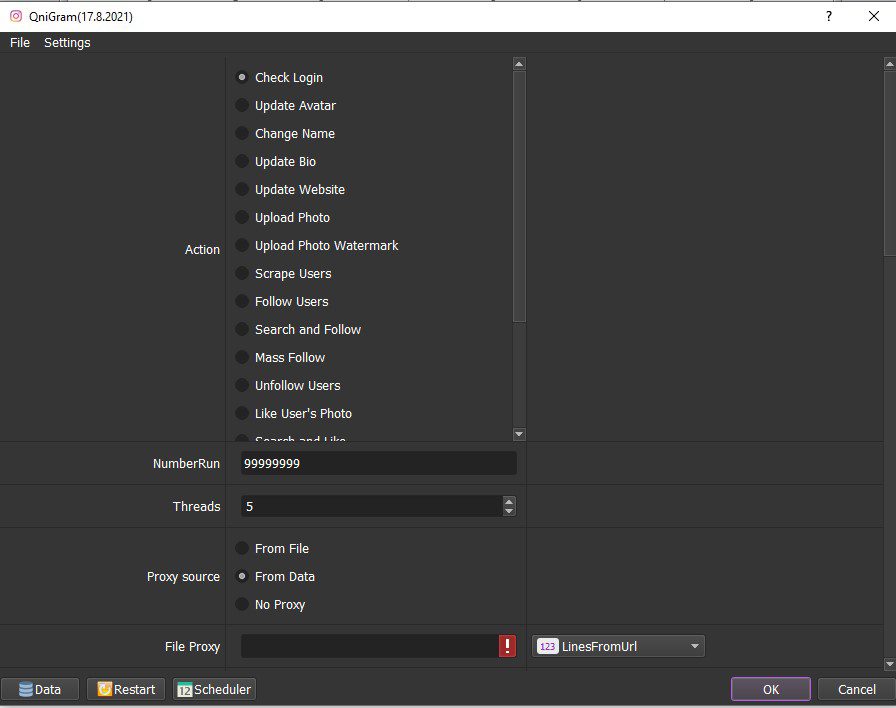

C1. Action
Select a function that you want to run.

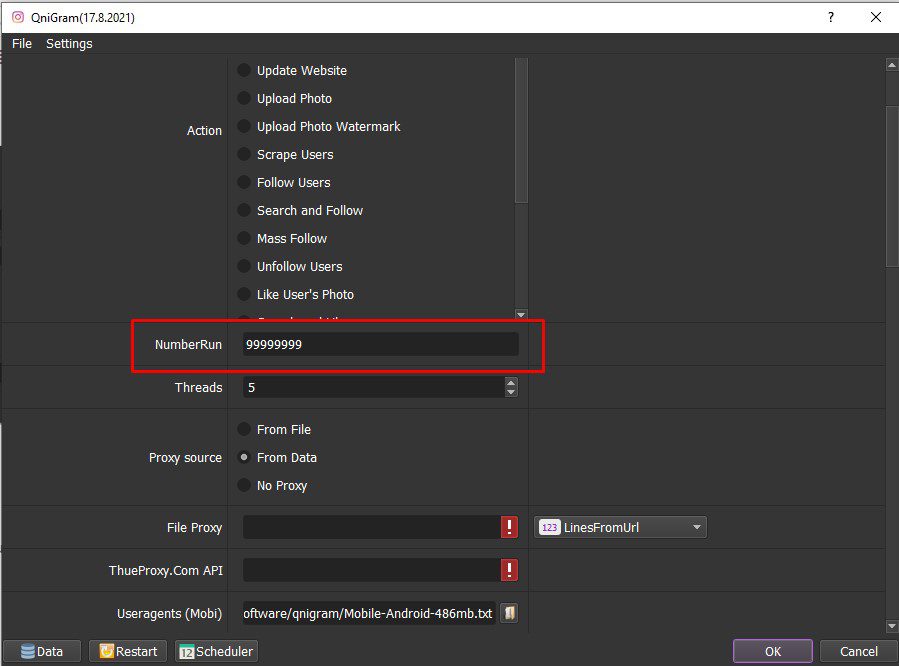
C2. Run
This is the number of times that you want the software to run. You can leave it as the default.

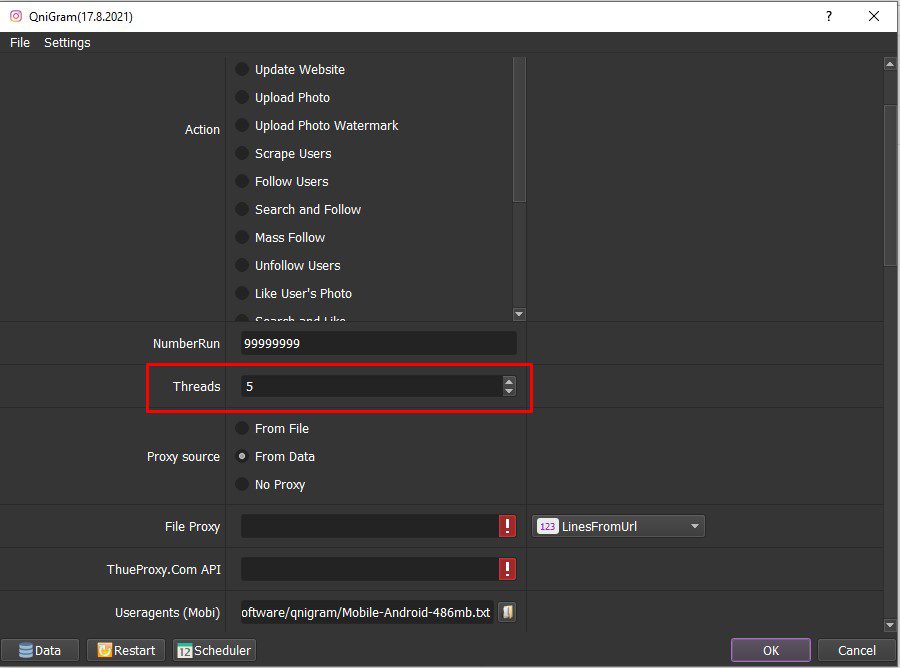
C3. Threads
The number of threads is the number of tabs, accounts, or windows that run at the same time.
Each thread will open a separate browser which has different fingering and IP. Provide number of threads that complies with your computer configuration.

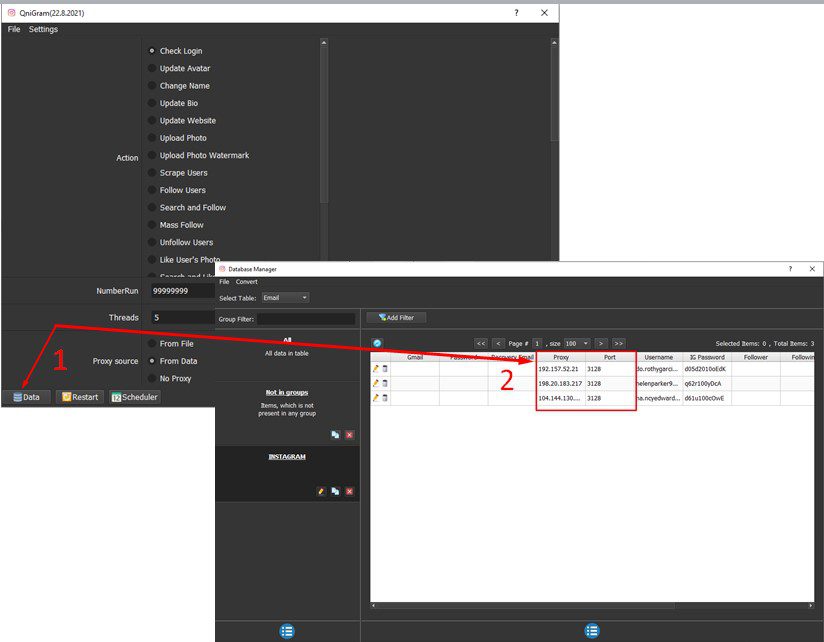
C4. Proxy Source
To avoid being locked out of your Instagram accounts, you should use proxies.
- If you choose From File, create a text file in which you will put the proxies one per line (for the LinesFromFile section), or paste the proxy address link (for LinesFromUrl section). Proxy format is IP:Port:Username:Password. Leave username and password empty if your proxy doesn’t have username and password ( Some proxies work with IP authentication instead of using username and password).
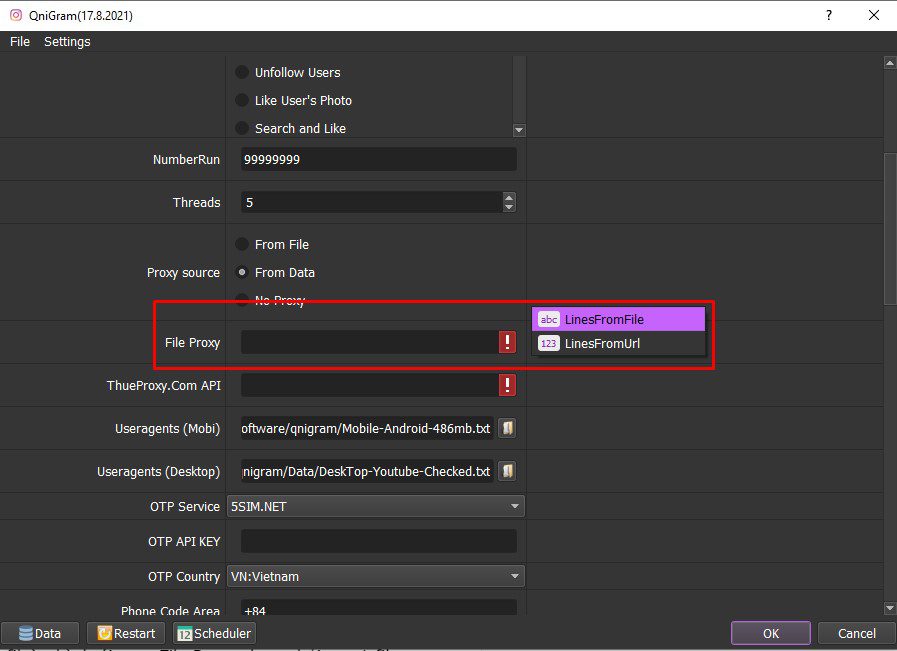

- If you choose From Data, click Data in the lower left corner of the software. The account management panel will display (Refer to the C8. Data section to know how to import the Proxy into the software).

- If you don’t have Proxy, choose No Proxy to run the software. Running too many Instagram accounts on the same IP can lead to your accounts locked.
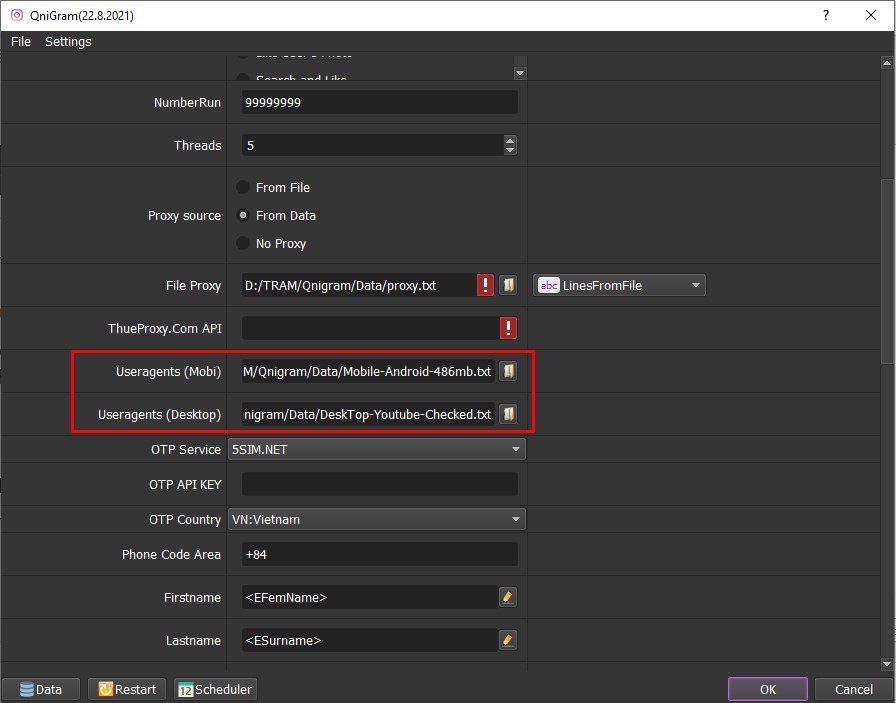
C5. Useragent (Mobi & Desktop)
Click on ![]()


C6. OTP Service; OTP API Key and OTP Country; Phone Code Area
When you log into Instagram accounts with different IPs and virtual devices, some accounts are asked for phone verification. Autobotsoft integrated some OTP Services so that the software can auto rent phone and get verifcation code automatically. You only need to register an account at one of these OTP providers.
OTP API Key: When you register an account at an OTP website, you will have an API key. Get that API key and put into this field. QniGram bot will auto rent phone numbers and get verification codes.
OTP Country & Phone Code Area: This field is only applied to 5sim.net. Select the Country that you want to rent phone number and put phone code area of that country into this field.
C7. Folder Cookies & Folder Data
Folder Cookies is a place where the software will store cookies and profiles of the accounts. Software will use cookies and profiles for the next runs without logging back into accounts. Create a new Cookies folder on any hardware disk that you want to save cookies and profile and get the path to put into the setting as shown:
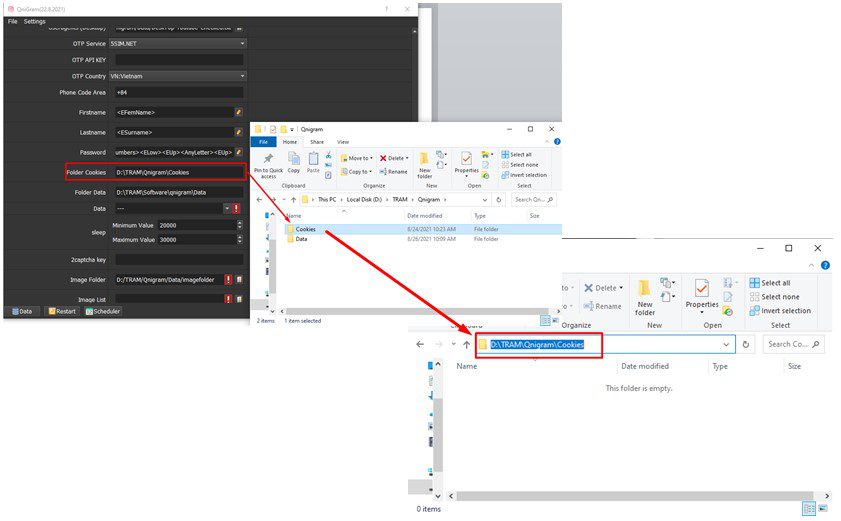

Do the same with Folder Data.
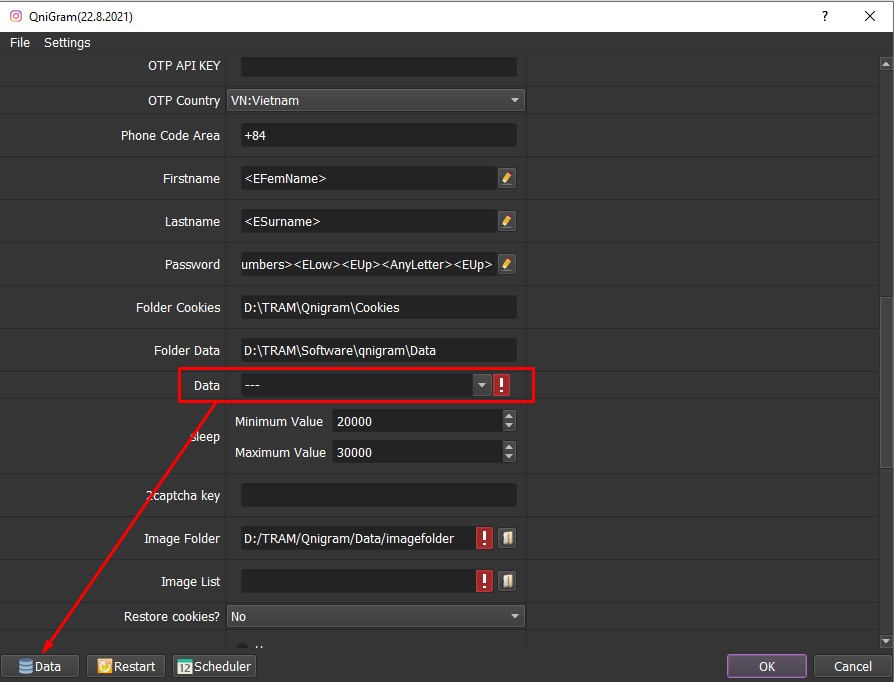
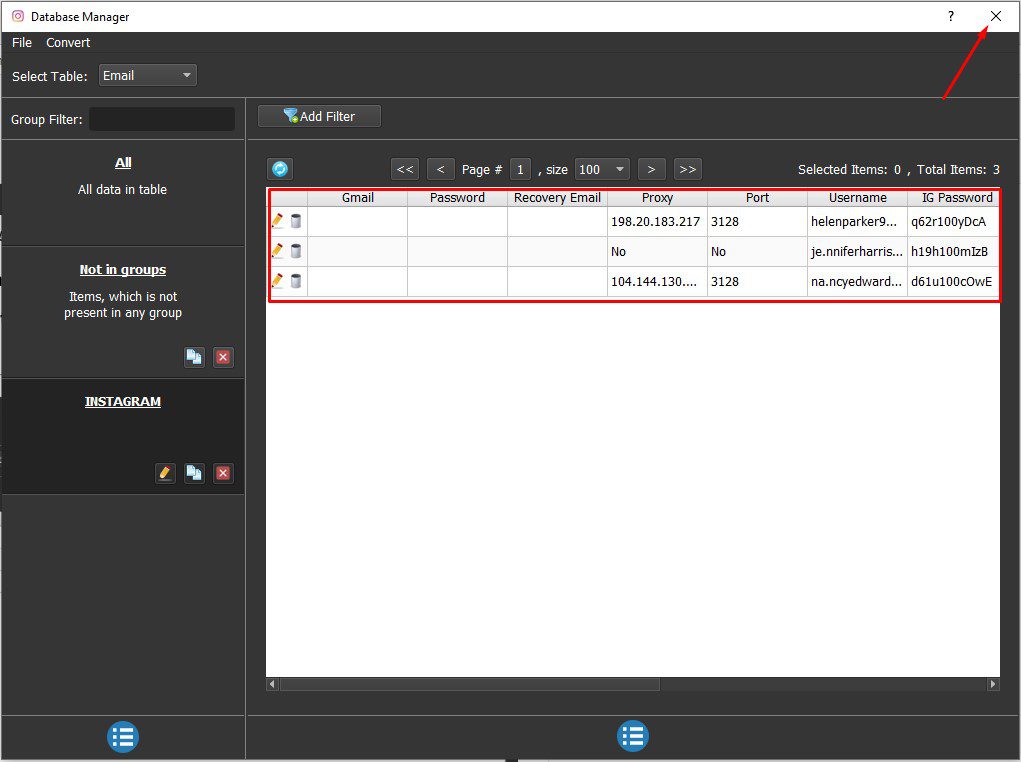
C8. Data
Click Data in the left corner of the screen to import Instagram accounts. The software will display the Database Management dialog box as shown.

-
AUTO POST ON INSTAGRAM WITH ACCOUNTS CREATED BY INSTAGRAMCREATOR SOFTWARE
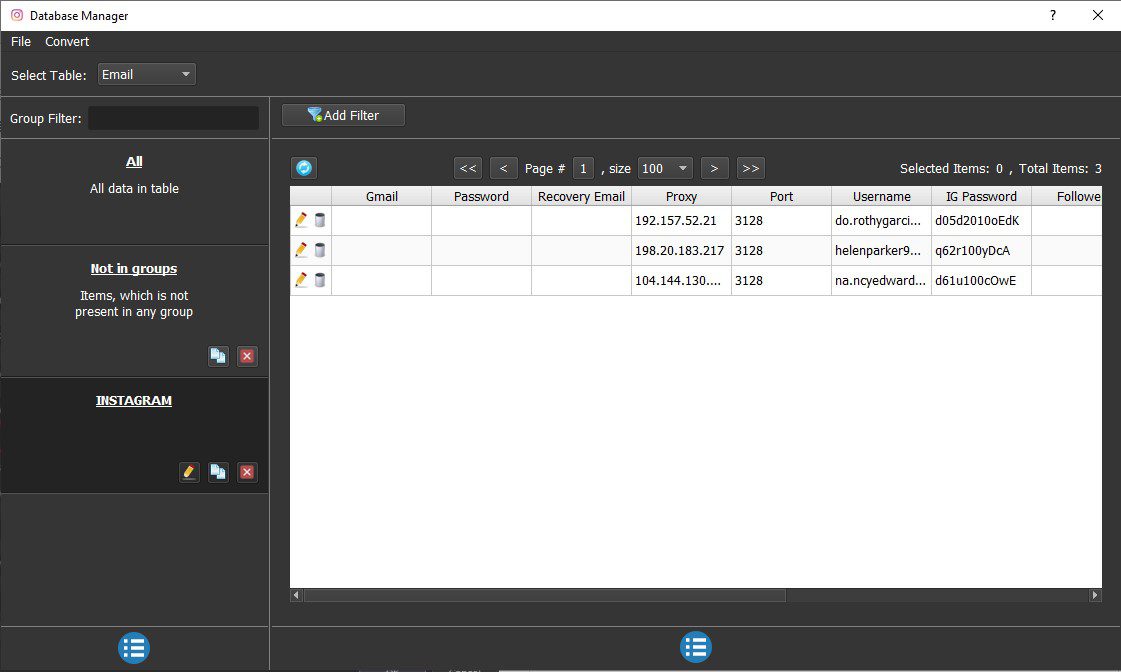
If Instagram accounts are created by InstagramCreator software of autobotsoft.com, they will be linked to QniGram software and will be saved in the “Not in group” folder.

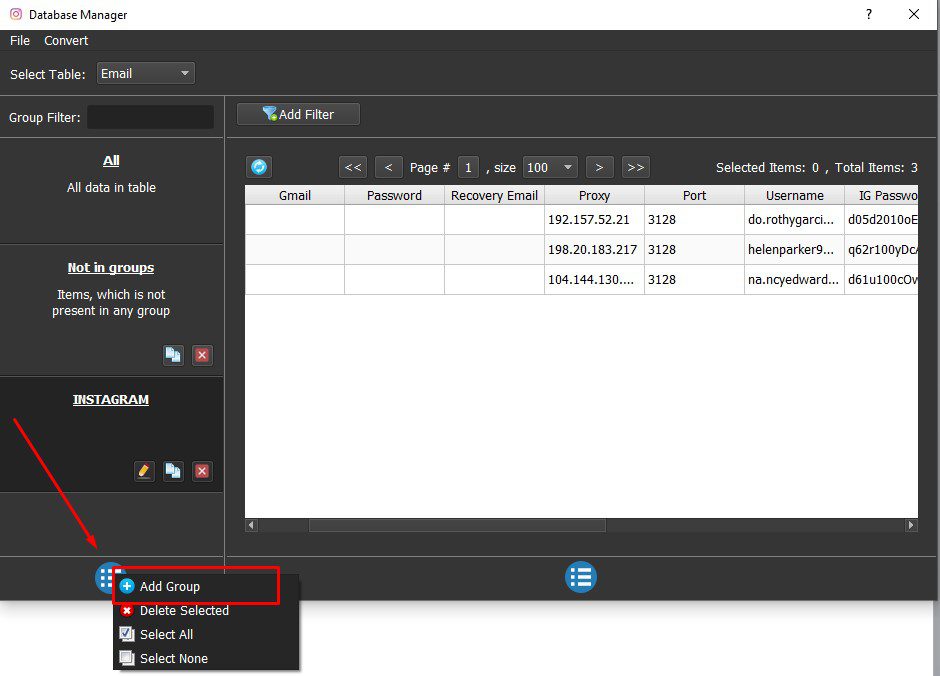
You can move accounts to other groups, by:
Step 1: Create a group to manage your account, click ![]()


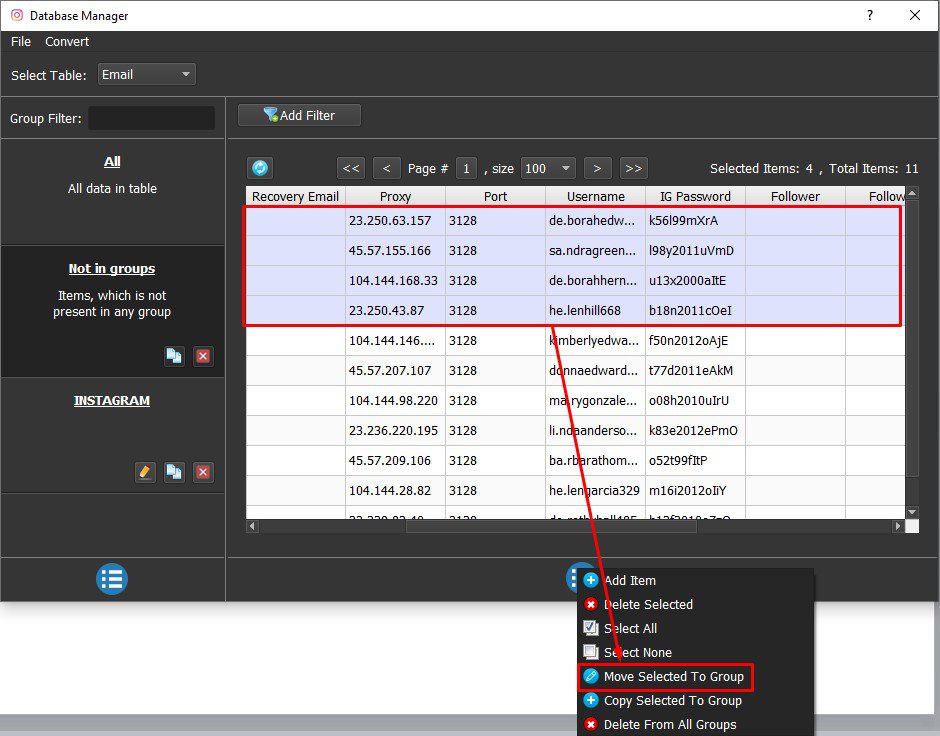
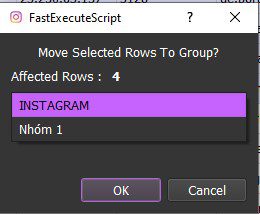
Step 2: select the accounts to move==> click ![]()


-
AUTO POST ON INSTAGRAM ACCOUNTS FROM OTHER SOURCES
If you use Instagram accounts from other sources. Please take steps as shown in this link HOW TO IMPORT DATA – IMPORT DATA INTO SOFTWARE (autobotsoft.com)
Step 3: Turn off the account management panel
After entering the accounts, the accounts will be shown as picture below. Turn off the account management panel to return to the software.

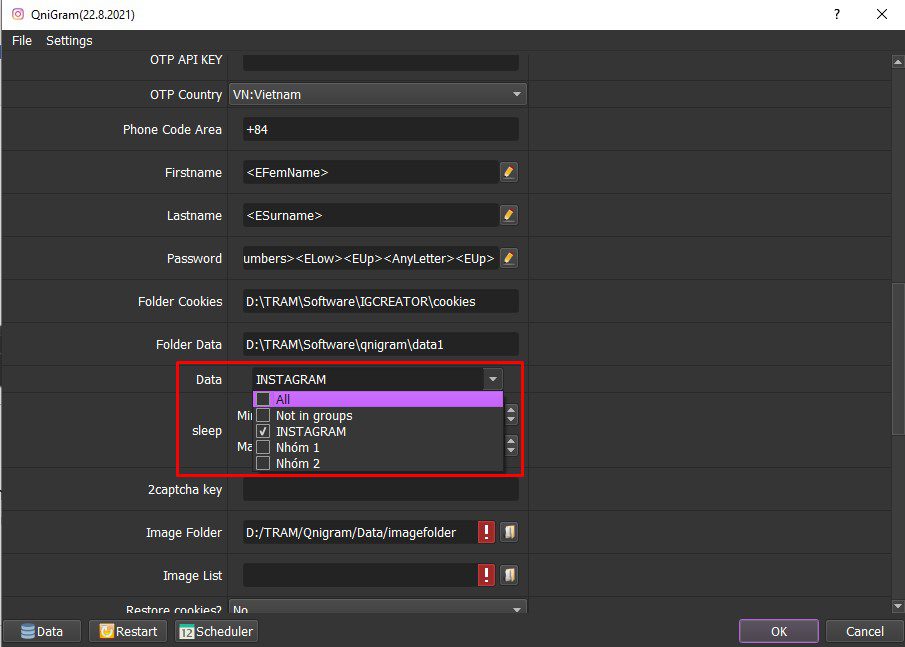
Step 4: Select the account group to run
In the Data section, select the group of Instagram accounts to run.
Note: You can select multiple groups to run at the same time.

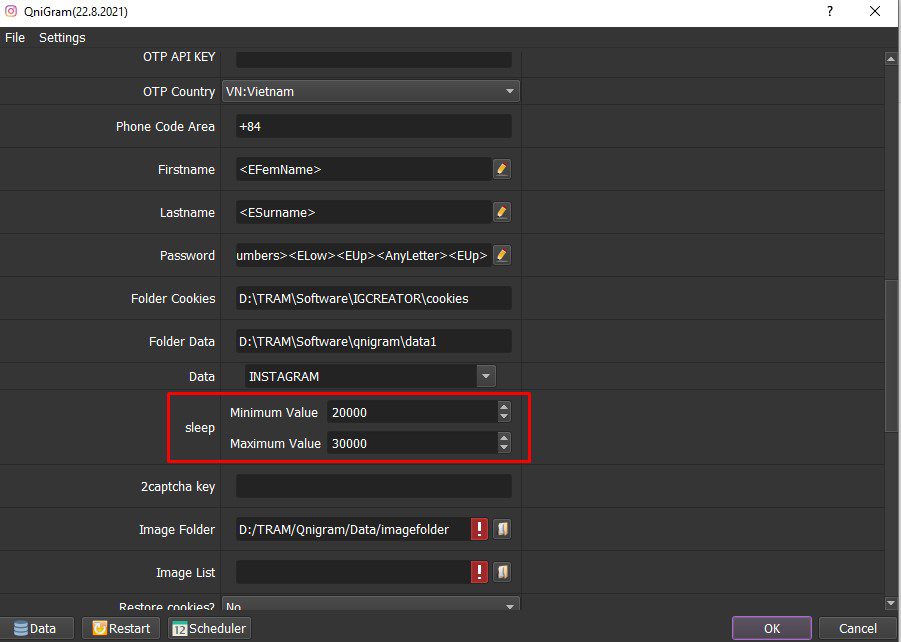
C9. Sleep
Sleep is time to wait between two actions.
Note: Unit is millisecond (30000 = 30 seconds)

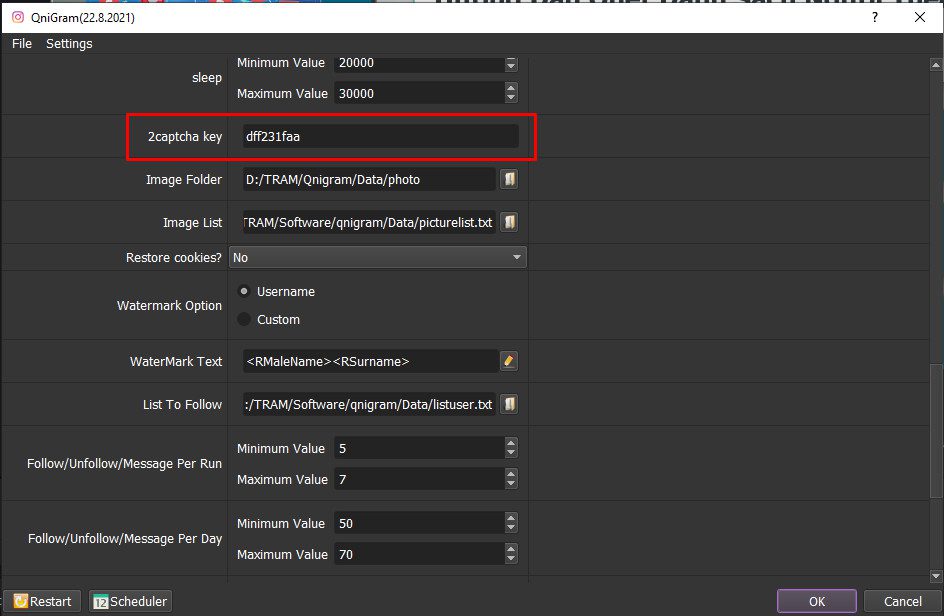
C10. 2Captcha Key
As mentioned in the OTP Service section, when you log in, the Instagram app will ask for a captcha verification in some cases. Therefore, you need to create an account at 2captcha.com, then copy and paste the code in the 2captcha key section. the software will automatically decode the captcha when you log in.

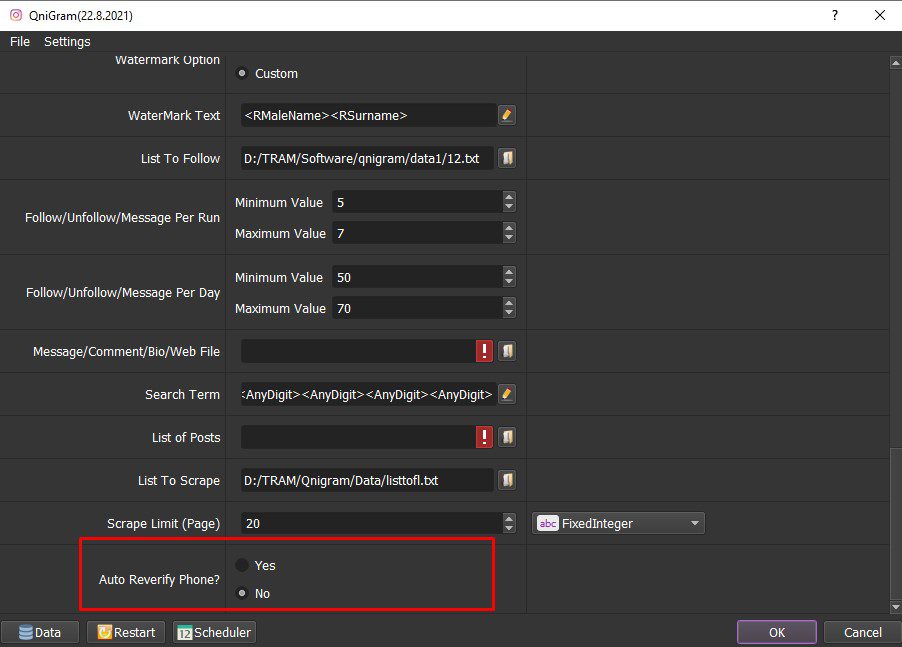
C11. Auto Reverify Phone
This function will automatically verify the phone number when you log in.
If you choose “Yes“, the software will get phone number and verification code from OTP website to verify Instagram accounts automatically. Conversely, if you choose “No“, when the account needs to be verified, the software will automatically ignore that account.

D. HOW TO RUN EACH FUNCTION QNIGRAM – AUTO POST ON INSTAGRAM
D1. Check Login
This function is used to check Instagram accounts before performing auto post on Instagram.
In the Action section, select Check Login -> Data (refer to Section 8, Part I) -> select the groups of accounts need to be checked ==> click “OK” to run.
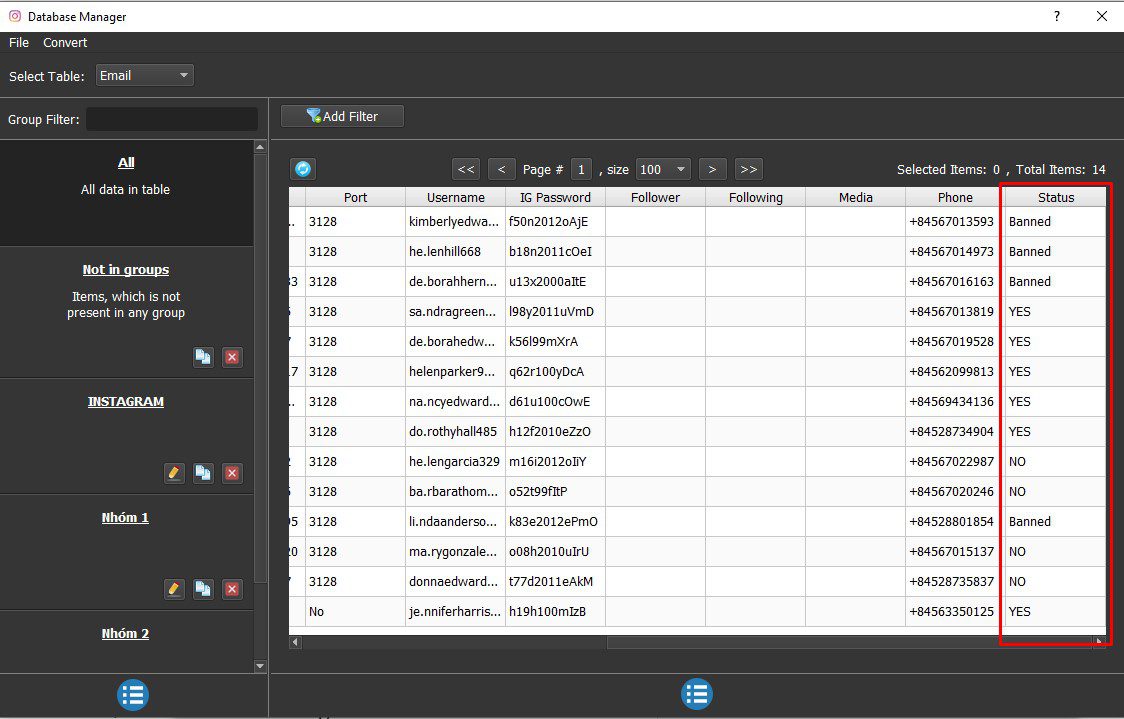
After running, go to the account management panel -> See the “Status” section to know the status of each account.

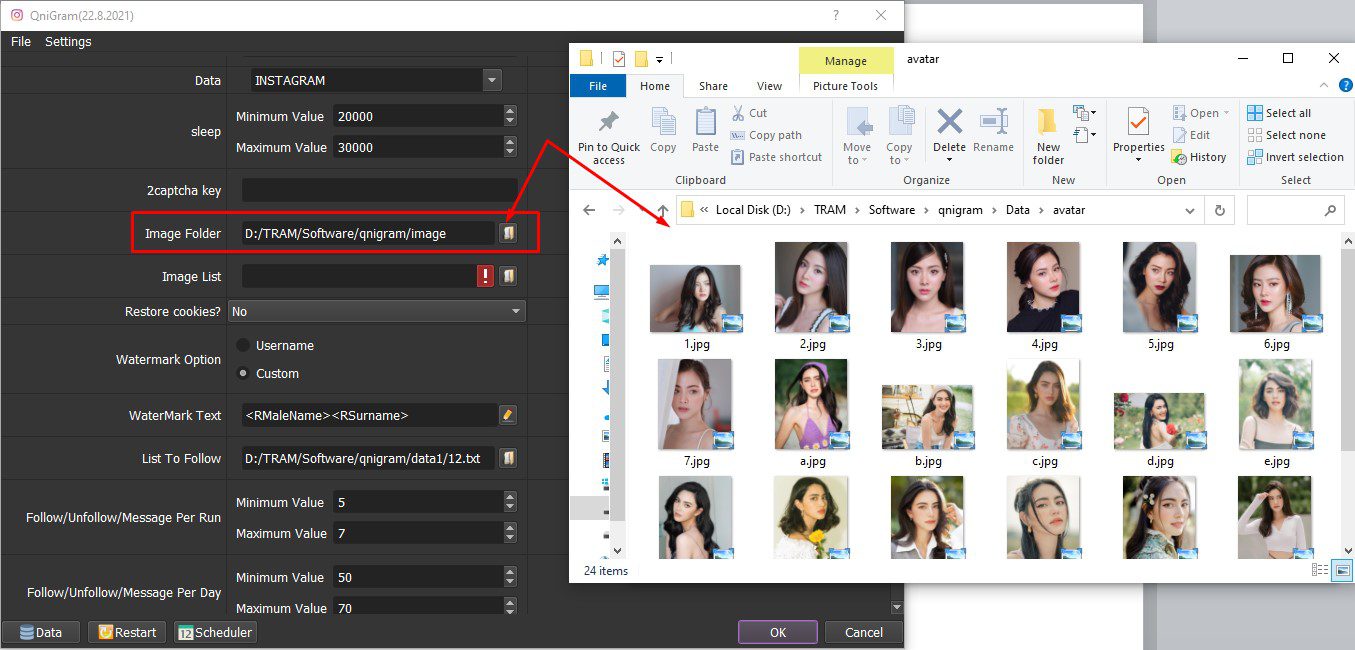
D2. Update Avatar
Update Avatar is used to update avatars for Instagram accounts.
In the Action section, select Update Avatar.
In the Image Folder section, click on ![]()
![]()

D3. Change Name
You will perform this function in case you want to change the name of Instagram accounts.
In the Action section, select Change name. Click ![]()


D4. Update Bio
This is a profile update function for Instagram accounts.
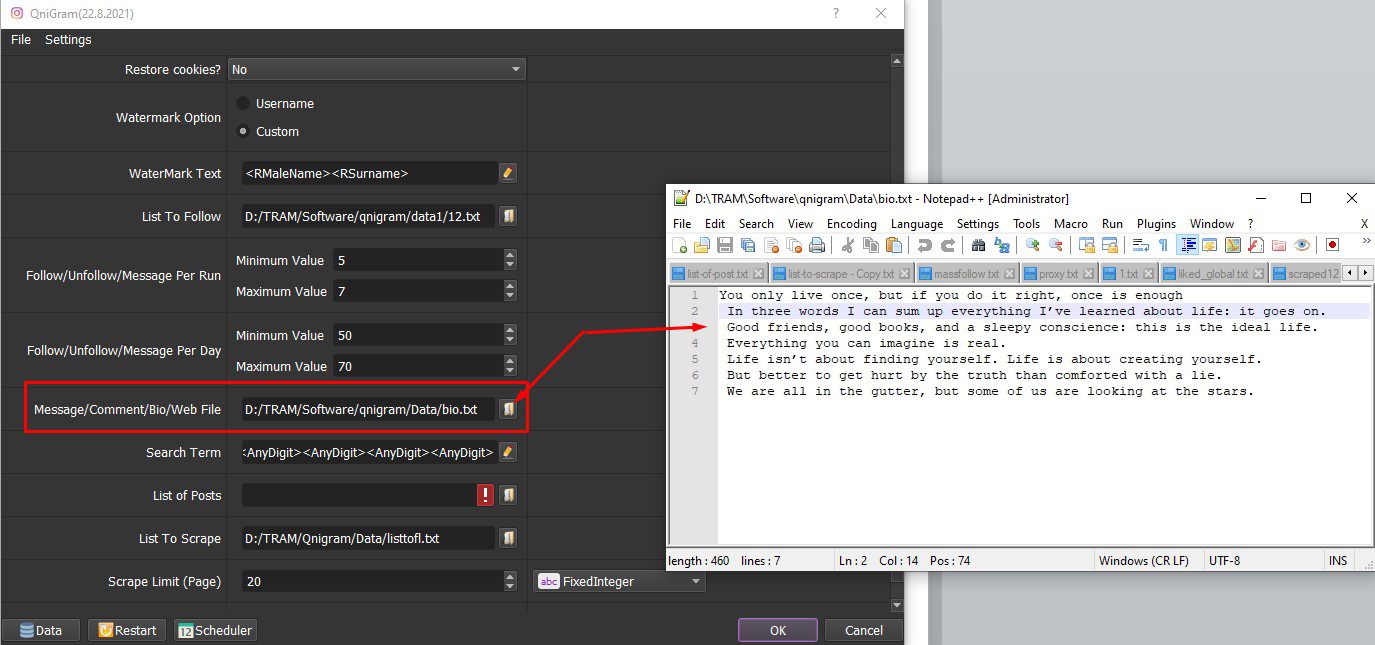
In the Action section, select Update Bio. Next, you create a text file to save the Bio you want to change. Software will use random line from this text file as BIO.
In the Message/Comment/Bio/Website section, click ![]()

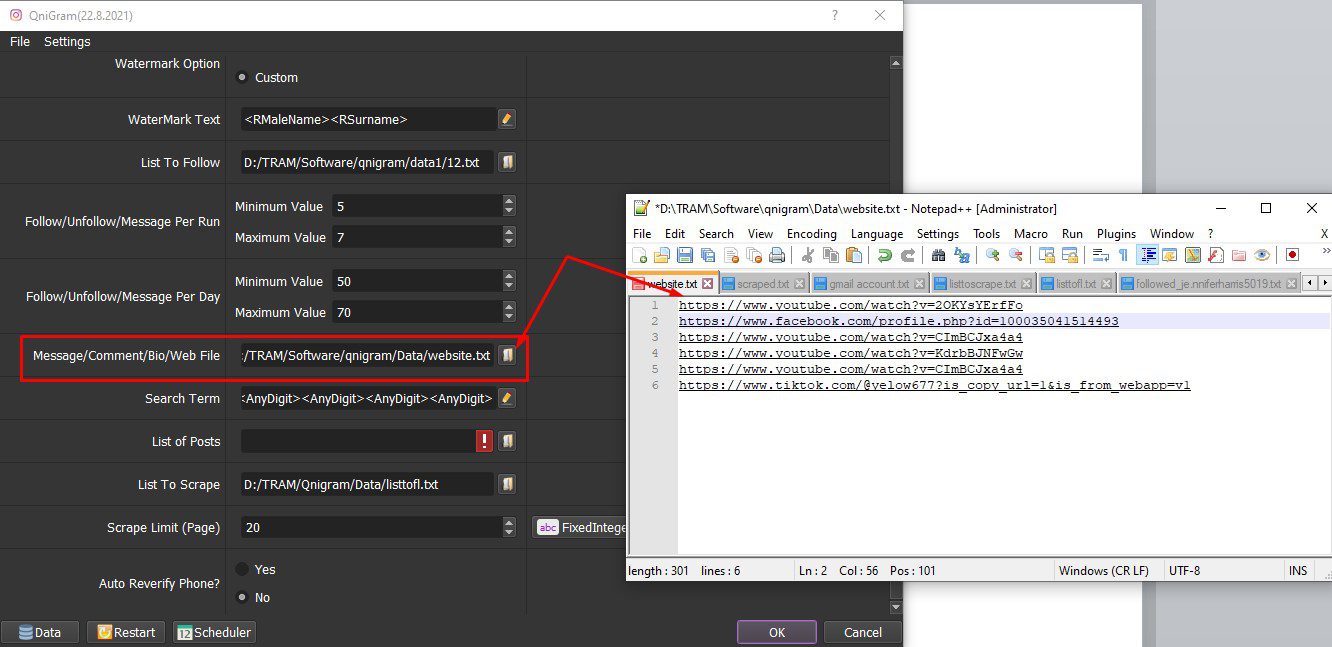
D5. Update Website
You choose this function to update the website for Instagram accounts,
You can leave the link to Youtube channel, Facebook, Tiktok, etc. as you want.
In the Action section, select Update Website.
In the Message/Comment/Bio/Website File section, click ![]()

D6. Upload Photo
Upload Photo is an automatic photo posting function on Instagram.
Similar to the Update Avatar function, you also need to create a folder to store the images. When running the Upload Photo function, the software will upload random images to Instagram from this image folder.
In the Action section, select Upload Photo. Next, select the Image Folder item ==> click ![]()

D7. Upload Photo Watermark
Upload Photo Watermark is a function for posting images with watermark.
First, In the Action section, select Upload Photo Watermark, create a folder to save the images that you want to upload.
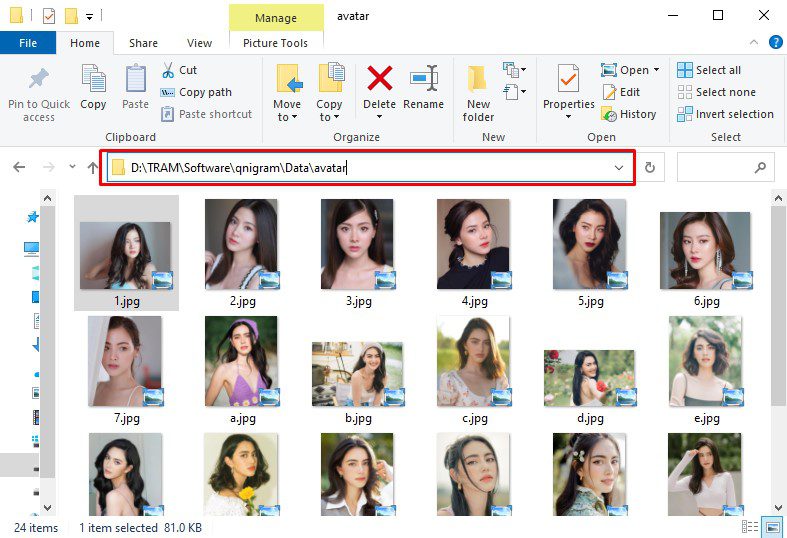

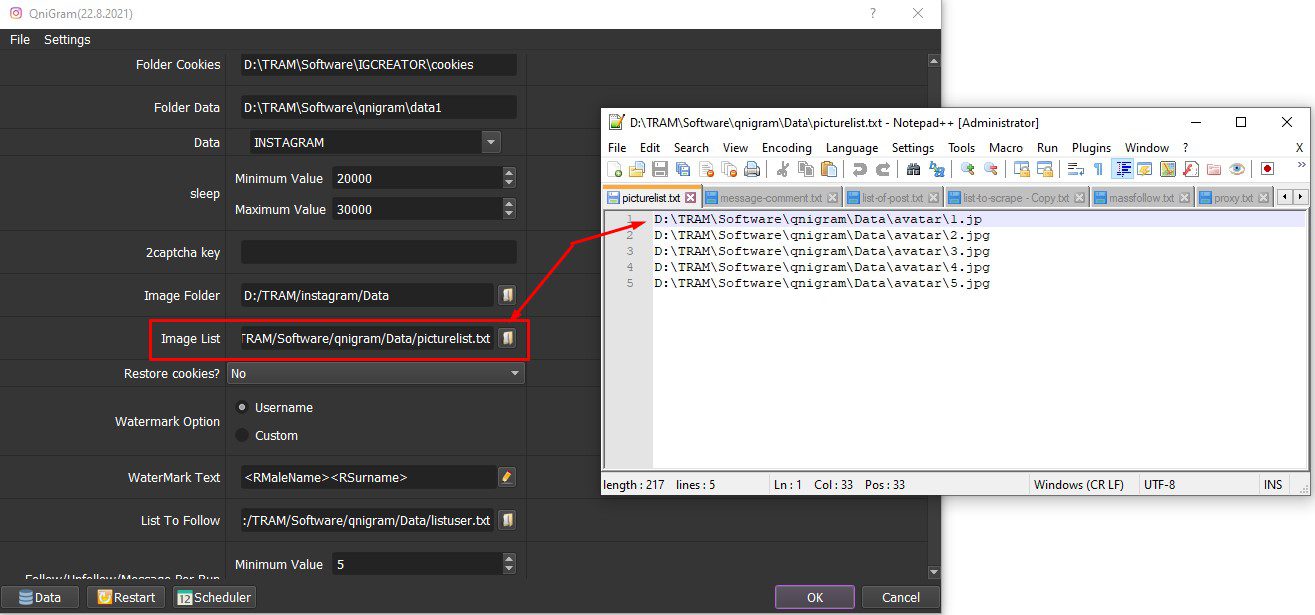
Next, you create a text file to save the path + name the image. For example: As picture above, the text file content has the form: D:\TRAM\Software\qnigram\Data\avatar\1.jpg
The file looks like the image below and each line will be an image.
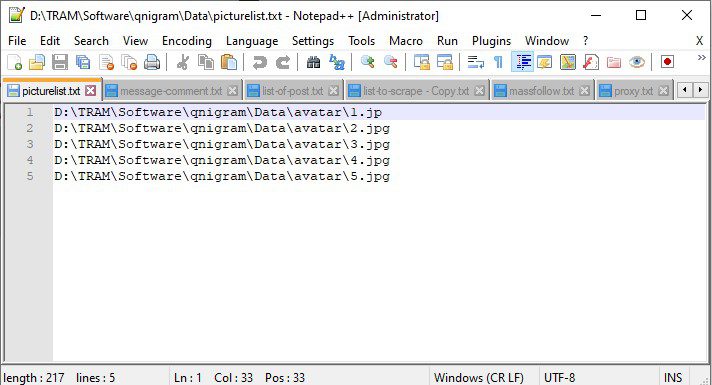

In Image List section, click ![]()

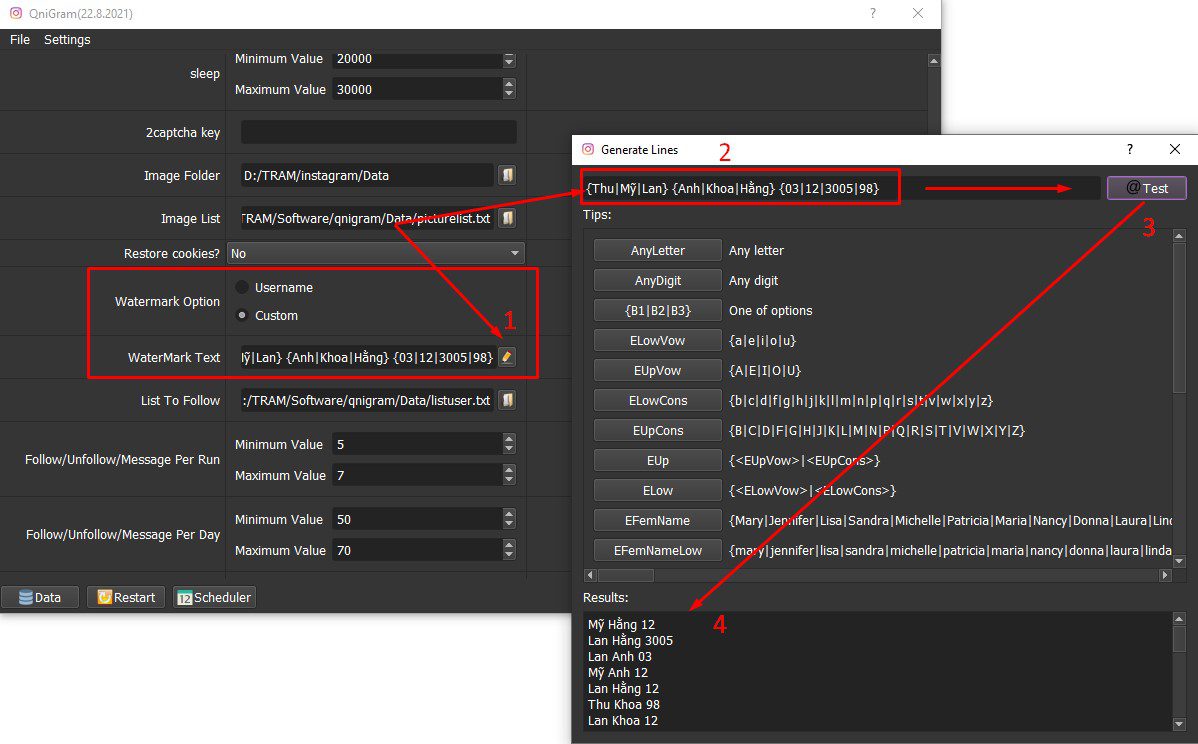
In Watermark Option section, you have two ways to watermark the images.
- Username: the watermark on the photo will be the username of that account.
- Custom: Define the custom watermark text by clicking


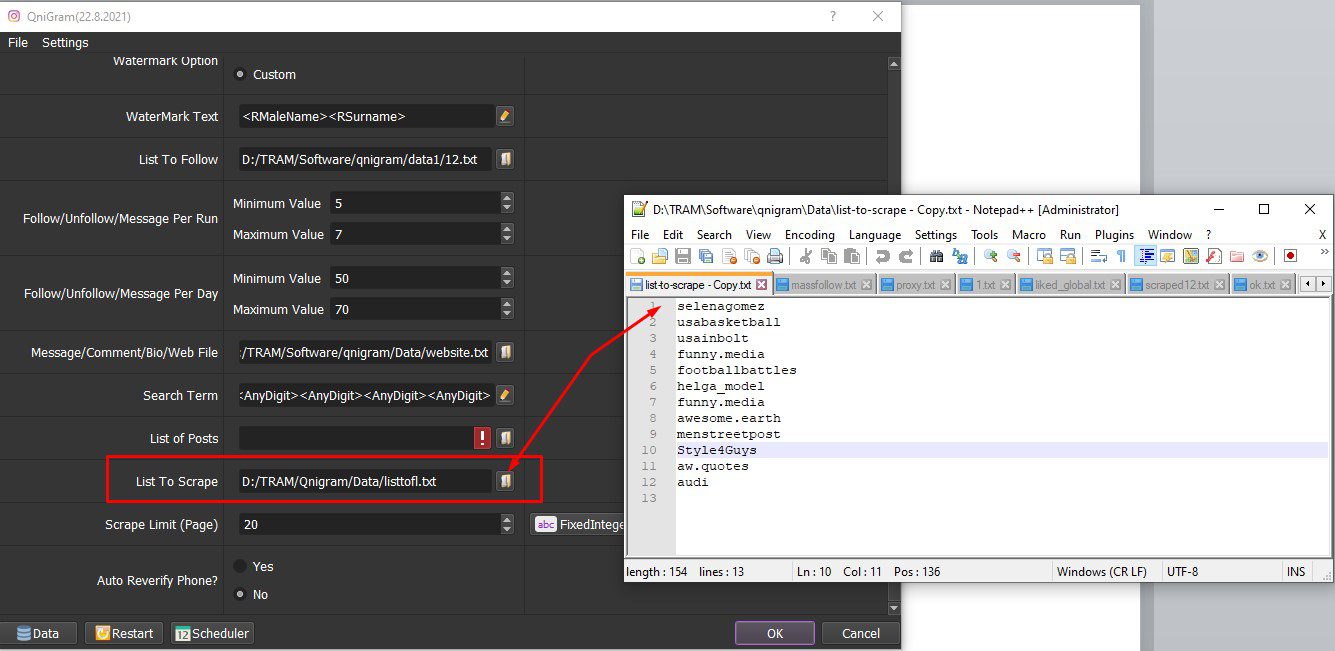
D8. Scrape Users
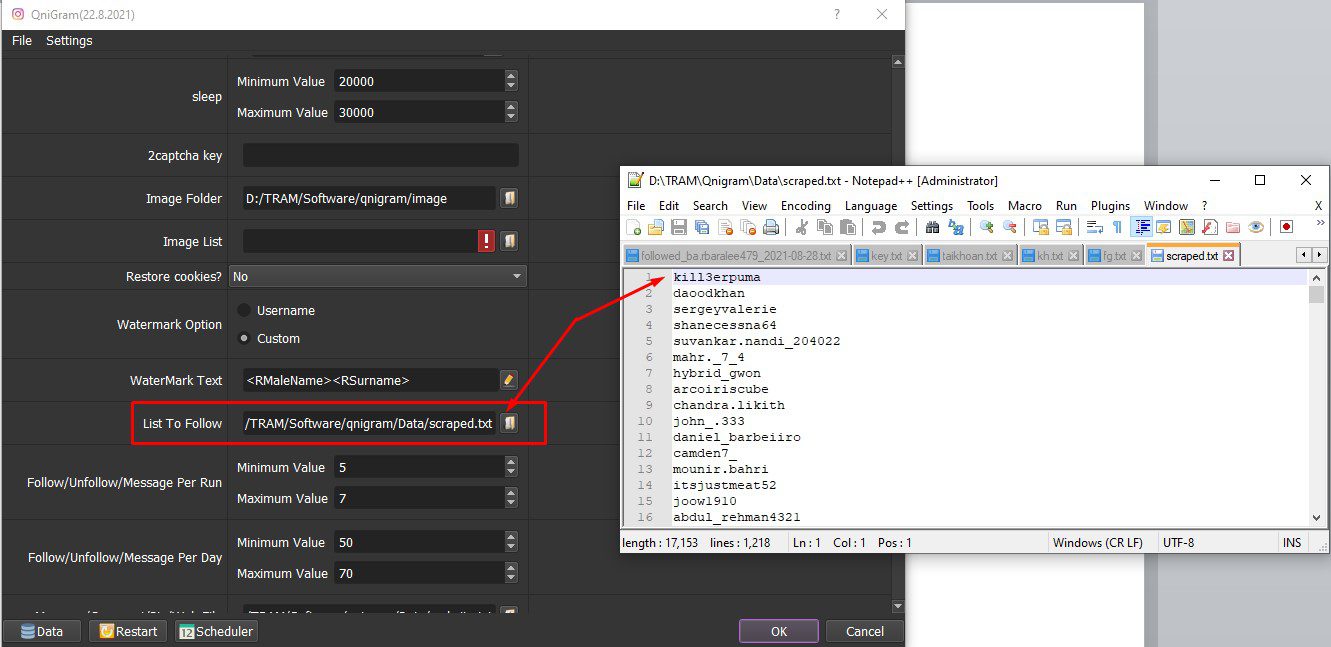
Scrape Users is a function to scrape users who are following other accounts. In the Action section, select Scrape User. In List To Scrape ==> click ![]()

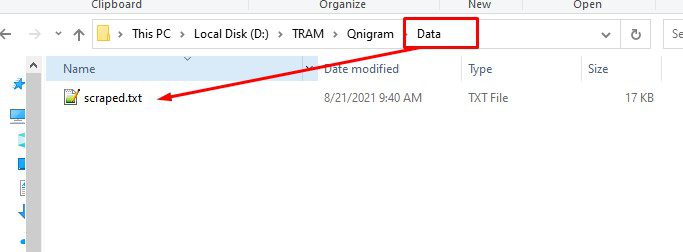
The results will be saved in the Data folder with the name Scraped (you created according to the instructions created in section 7 part I).

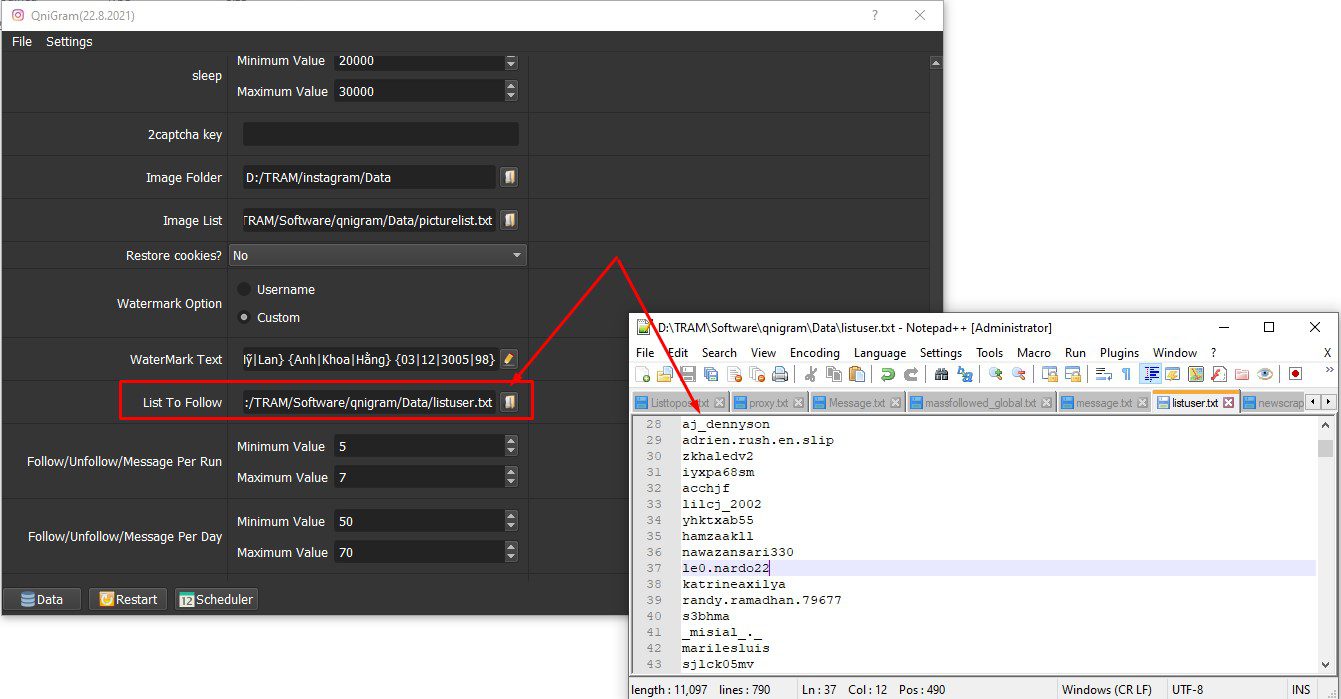
D9. Follow Users
Your Instagram accounts will follow many other users according to the available list. To get this list of users, you run the Scrape Users function (refer to section 8 part D), or you can create another file to store the usernames that you want to follow.
In the Action section, select the Follow Users function. In the List to Follow section ==> select the file containing the users ==> Click OK to run.

Set up how many people follow each account and how many people follow each day (refer to section 20, part D).
D10. Search & Follow
This function is used to find and follow users. In the Action section, select Search & Follow:
- Click OK to automatically search and follow accounts by default of the software.
In the Search Term section, click
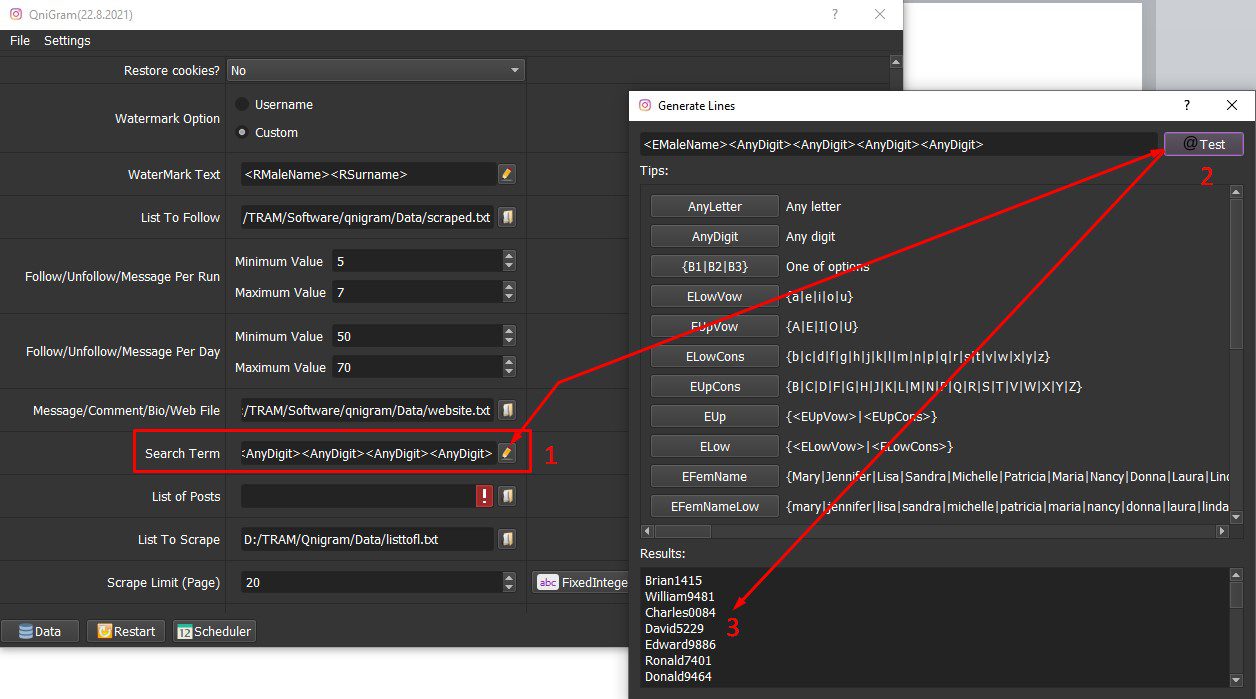

If you want the software to search and follow specified users, in the Search Term section, click ![]()

D11. Mass Follow
Mass Follow is used to increase followers for Instagram accounts.
In the Action section, select Mass Follow. In the List to Follow section, click ![]()


D12. Unfollow User
In Action section, select Unfollow User -> Click OK to run.
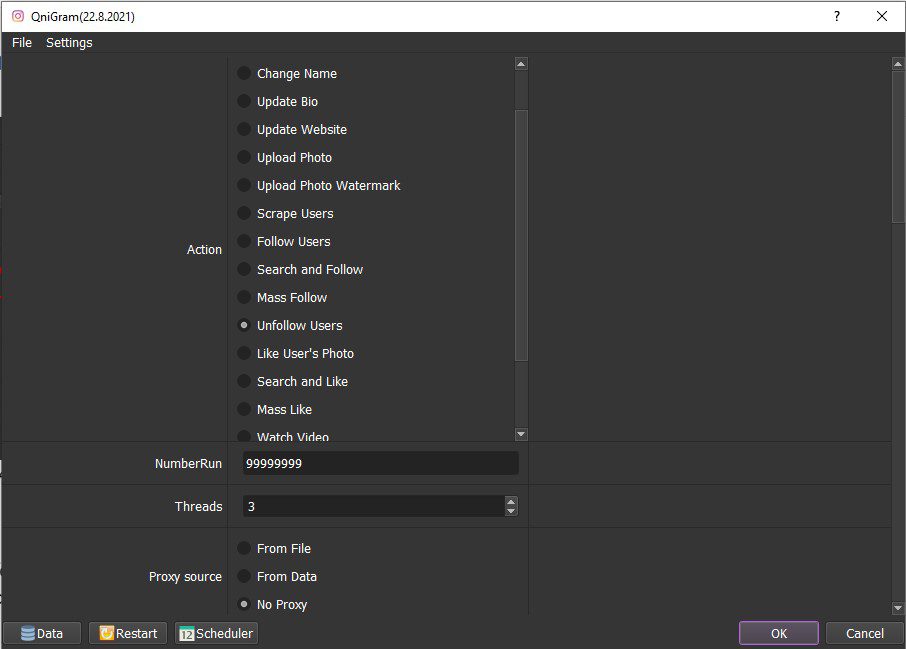

You can read section 20, part D to set up accounts that be used to unfollow each day.
D13. Like User’s Photo
The software will auto like user’s new photo by this function.
In Action, choose Like User’s Photo.
In List to Follow, click ![]()

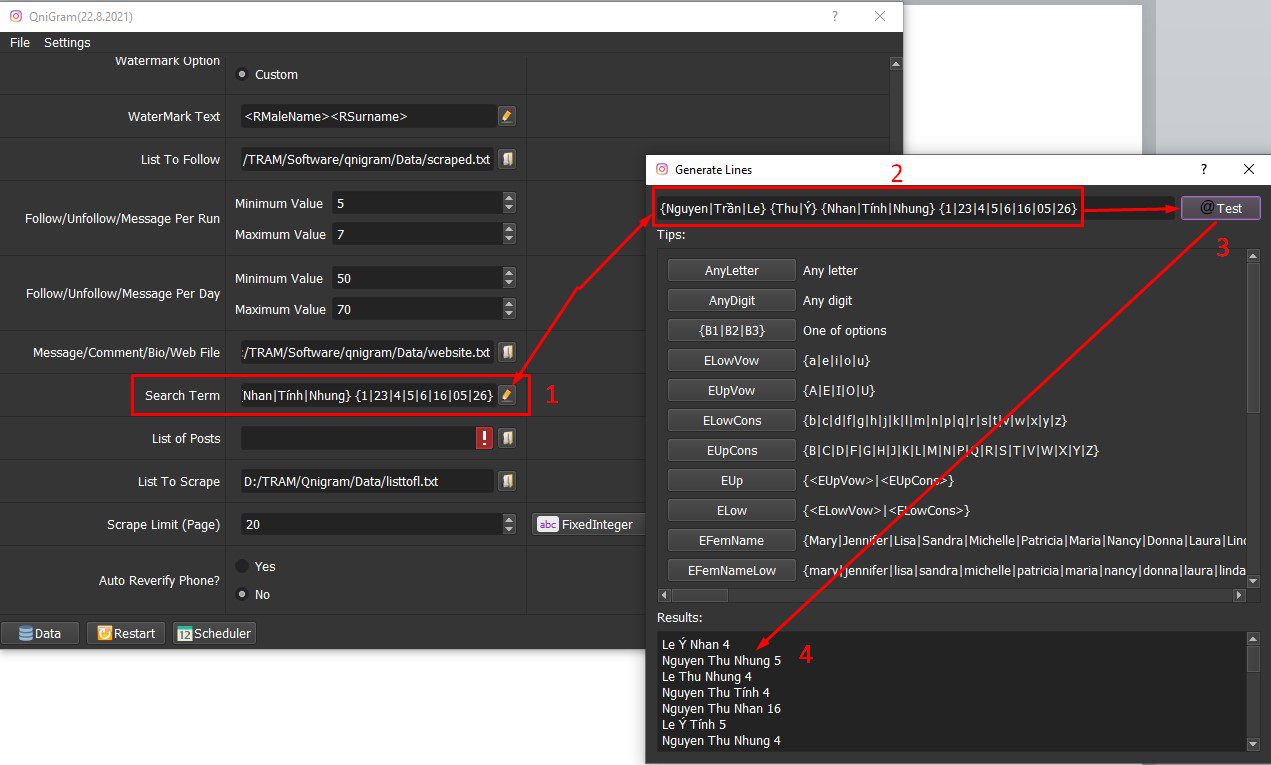
D14. Search & Like
Similar to the Search & Follow function, the Search & Like function will automatically search and like the first post.
Select Search & Like in Action => click OK to run.
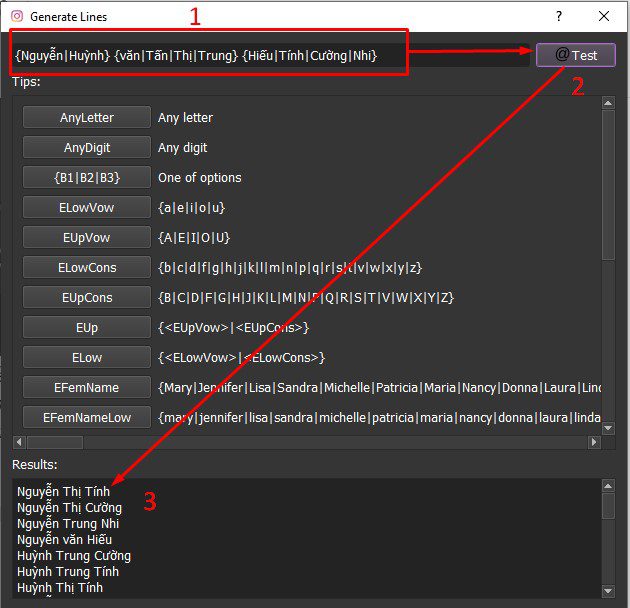
You can use Spintax format or select predefined Tips as shown in the following screenshot.
To see a list of pre-set users, go to Search Term, click ![]()
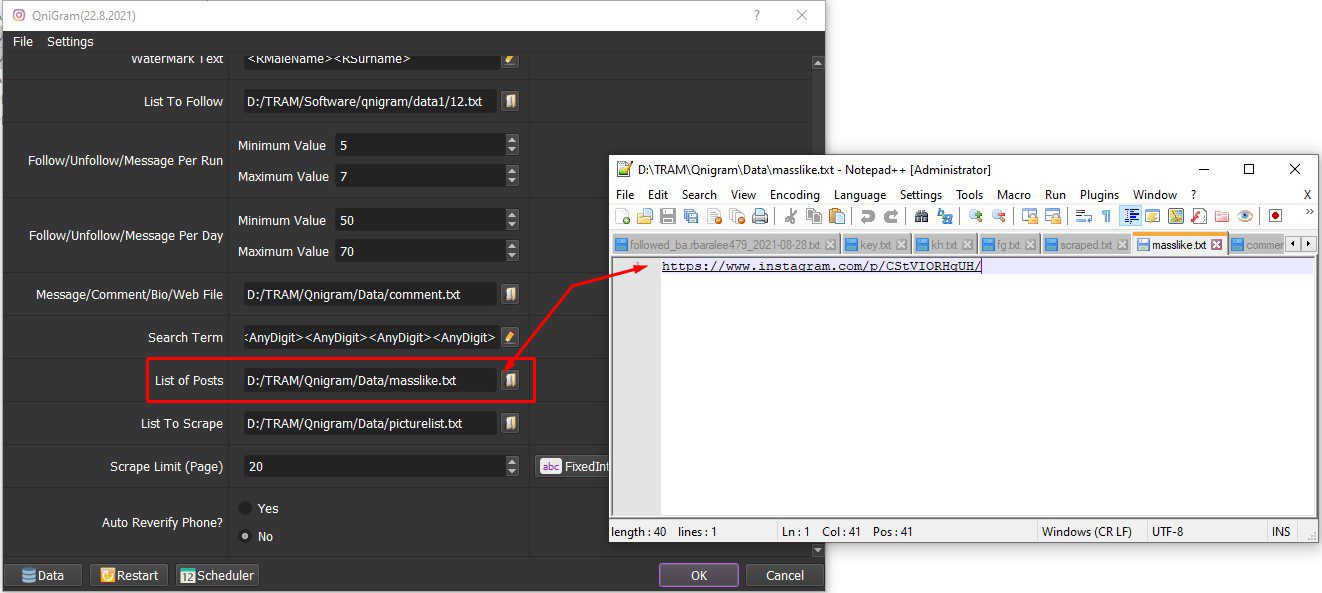
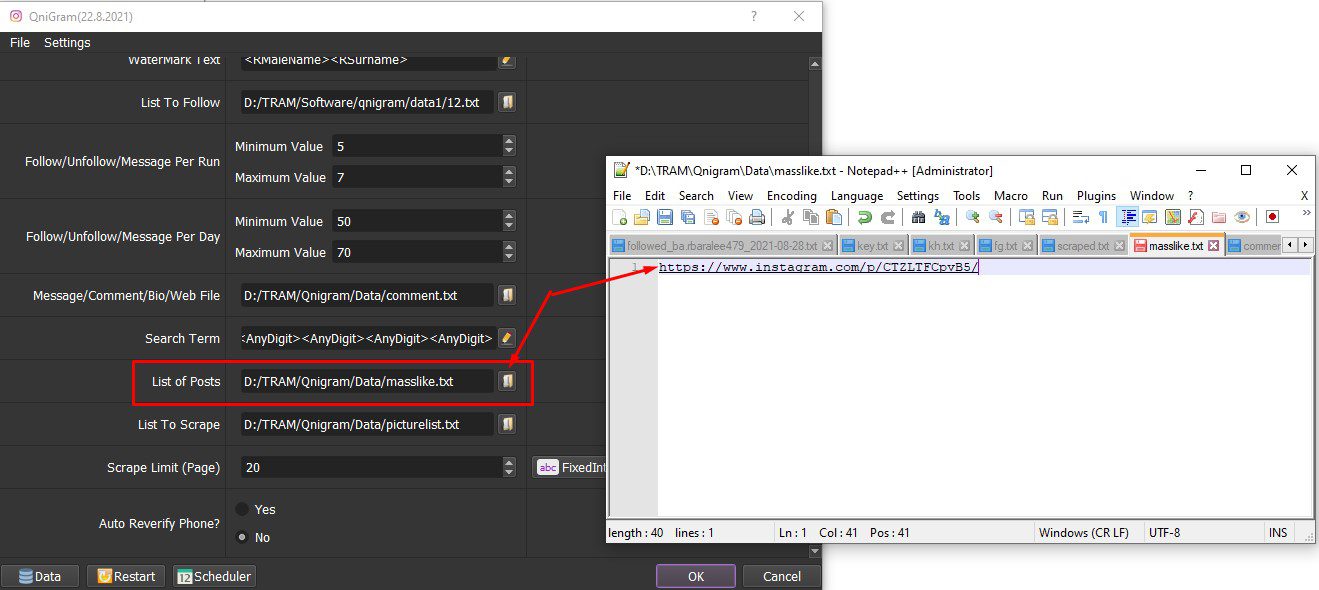
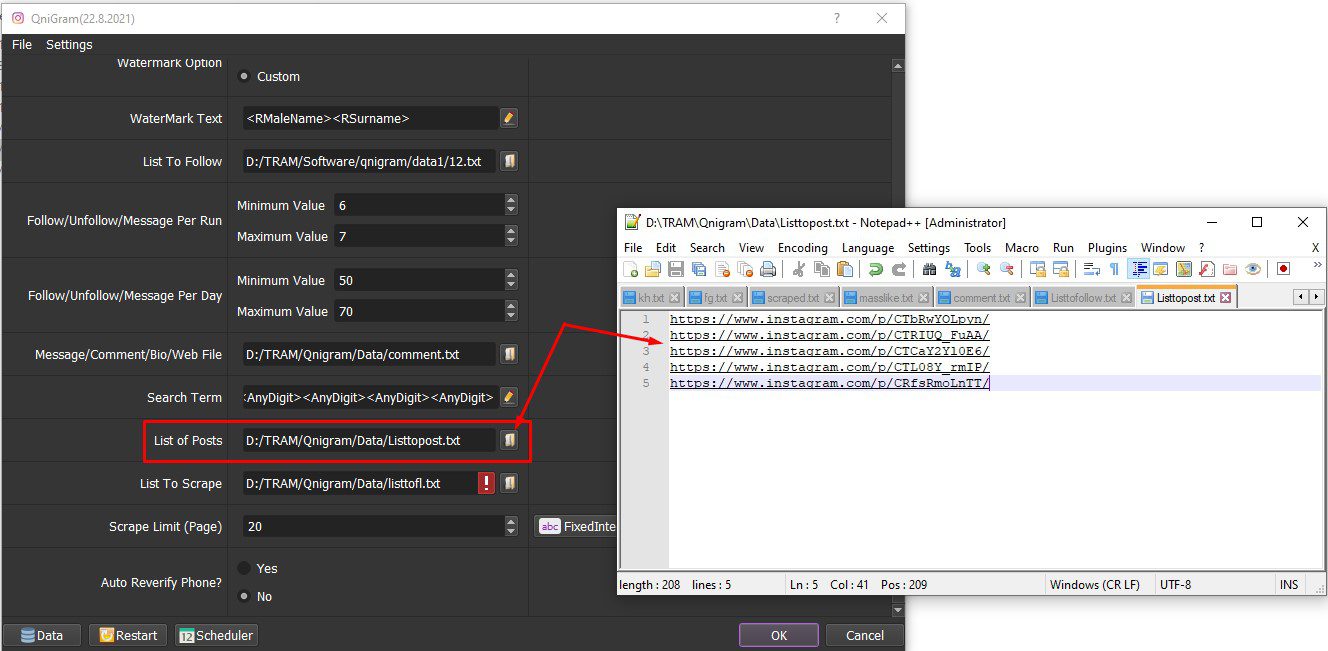
D15. Mass Like
Select Mass Like in the Action section.
In the List of Post section, click ![]()

D16. Watch Video
To increase views of videos on Instagram, you run this function.
In Action, select Watch Video.
At List of Post ==> click ![]()

You set up the time to watch video in the Sleep section.
Note: unit is millisecond (Ex: 20000 = 20 seconds).
Click OK to run.
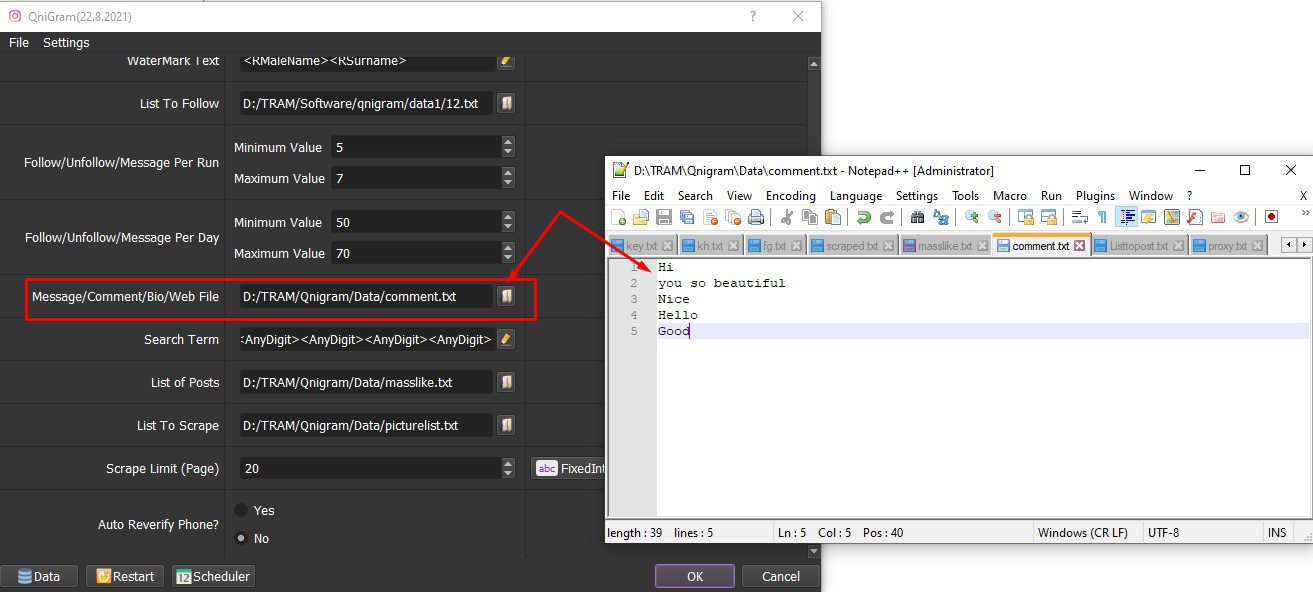
D17. Comment User’s Photo
At Action section, select Comment User’s Photo.
In List to Follow, click ![]()
In Message/Comment/Bio/Web File, click ![]()

D18. Mass Comment
Mass Comment is used to increase comments of the post. At Action, select Mass Comment.
Note: Files are created in .txt format.
In Message/Comment/Bio/Web File, click ![]()
At List of Post, select ![]()

D19. Message User
This function is used to message to the users whose accounts followed.
In Action, select Message User.
In the Message/Comment/Bio/Web File section, click ![]()
Note: each line in the text file is a message, the software will randomly message.


To set up how many messages per day, see Section 20, Part D.
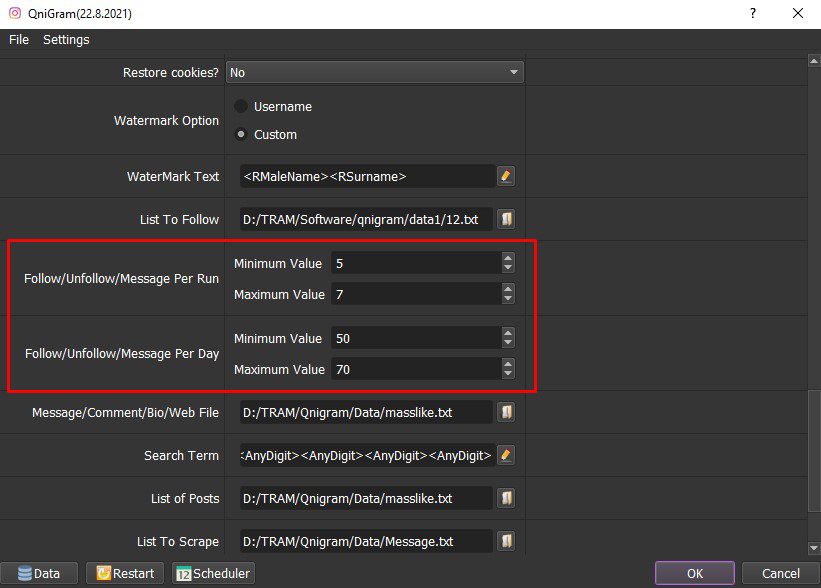
D20. Follow/Unfollow/Message PerRun and Follow/Unfollow/Message PerDay
Follow/Unfollow/Message PerRun/ PerDay is the number of followers/ unfollowers/ messages of each account per run/ per day.
Ex: Follow/Unfollow/Message Per Run is 5-7 and Follow/Unfollow/Message Per Day is 5-70. That means each account will follow/unfollow/message to 5-7 people each time, then switch to another account, and then run this account again until when enough the number of follow/unfollow/message per day is 50-70.

Tutorial Video


Contact info
Email: autobotsoft@gmail.com
FaceBook: https://www.facebook.com/autobotsoftsupport
Skype: live:.cid.78c51cd4e7238ae3
YouTube: https://www.youtube.com/channel/UCGftS8E3vX7IaUwg4GgDWDQ
Twitter: https://twitter.com/autobotsoft